Windows XP
-
Click Start.
-
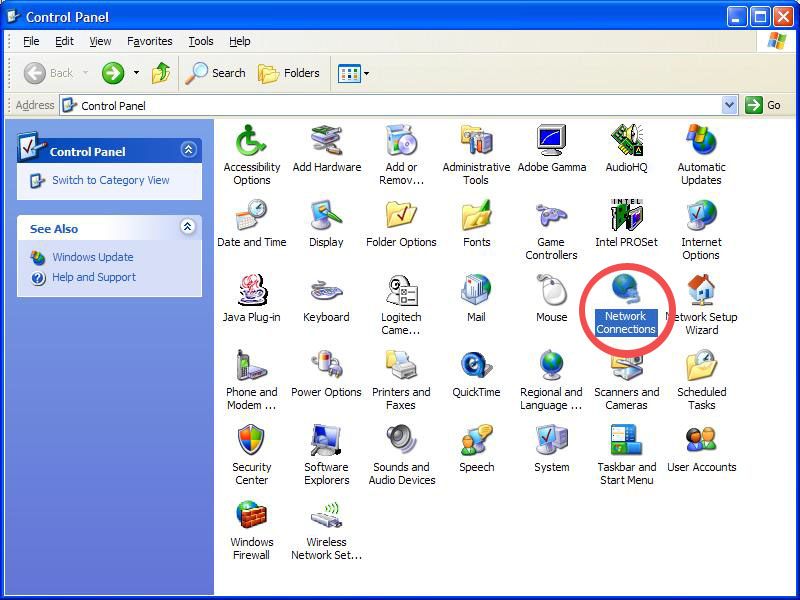
Click Control Panel. If your Control Panel window does not look similar to the following graphic, in the left-hand column of the window, click Switch to Classic View.
-
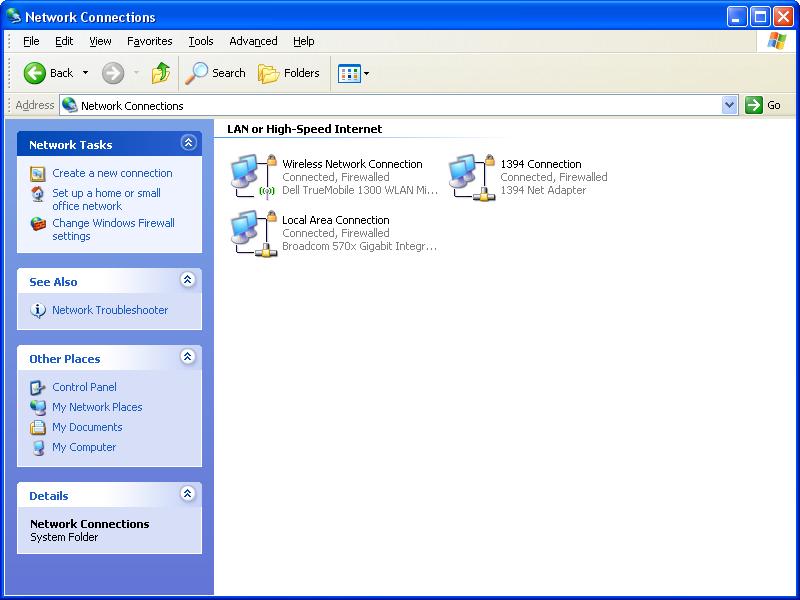
Double-click Network Connections (the icon circled in red in the following graphic).
-
For each network connection, right-click the connection and click Properties.
-
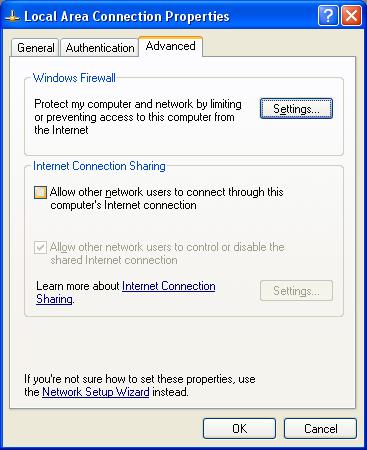
Click the Advanced tab and verify that the checkbox in front of Allow other network users to connect through this computer's Internet connection is NOT checked, as shown in the following graphic:
-
Click OK to save the setting.
-
Close the Control Panel window.
After you verify that Internet
Connection Sharing is turned off for all network connections, your
computer should be safe to connect to the University's network.
You may need to turn on Internet
Connection Sharing while using your computer on your home network.
However, you must disable it each and every time you return to campus.
There is no faster way to get your network access turned off than to
leave the setting turned on when connecting on campus.
Windows Vista
- Click Start.
- Click Control Panel. If your Control Panel window does not look similar to the following graphic, in the left-hand column of the window, click Classic View.
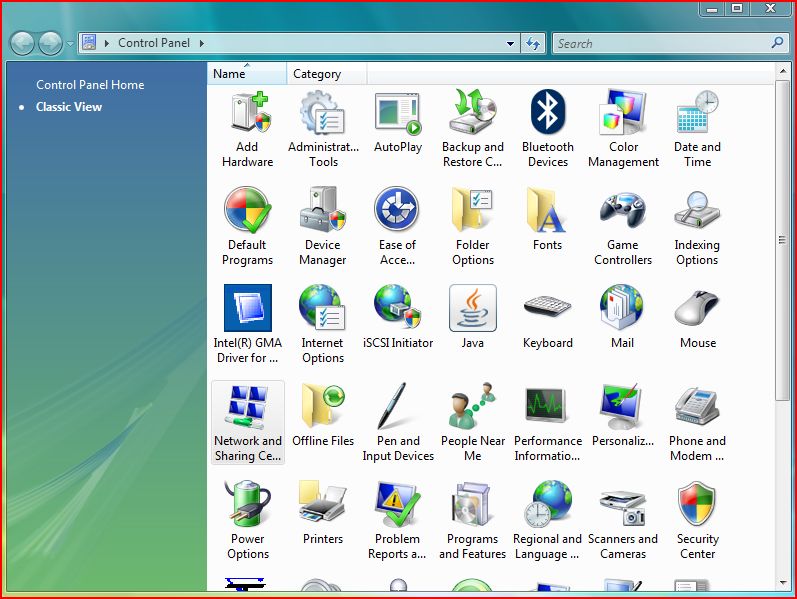
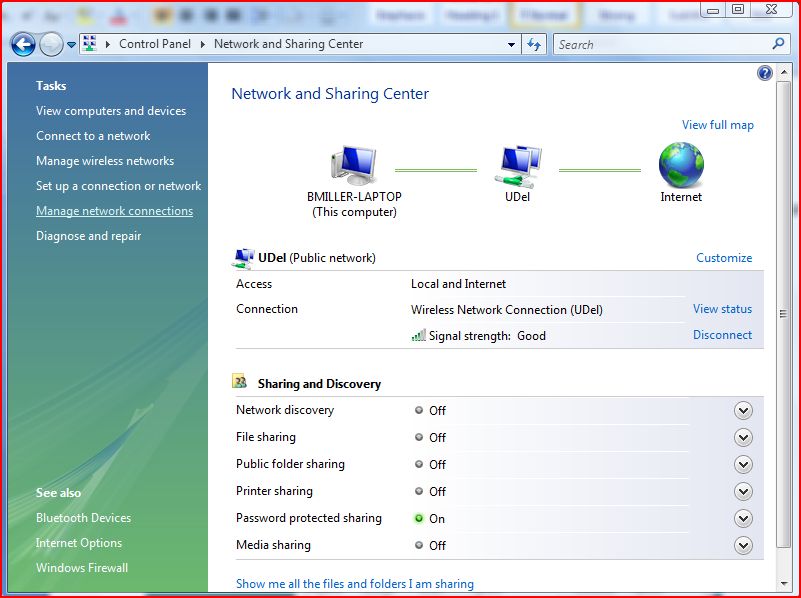
- Double-click Network and Sharing Center.
- In the left-hand column of the Network and Sharing Center window, select Manage network connections.
- The following change only needs to be made if there is more than one network connection listed. For each network connection listed, right-click the connection and click Properties.
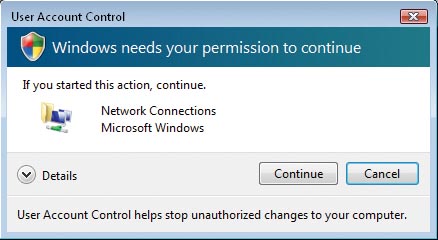
- If you see the User Account Control dialog box at any point during the configuration process, click Continue.
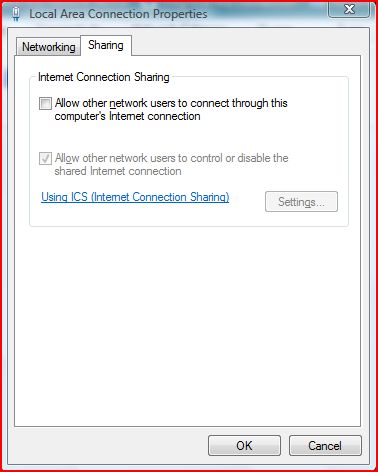
- Click the Sharing tab.
- Under the Internet Connection Sharing section, make sure that the checkbox in front of Allow other network users to connect through this computer's Internet connection is NOT checked, as shown in the following graphic:
- Click OK to save the setting.
- Close the Control Panel window.
After you verify that Internet
Connection Sharing is turned off for all network connections, your
computer should be safe to connect to the University's network.
You may need to turn on Internet
Connection Sharing while using your computer on your home network.
However, you must disable it each and every time you return to campus.
There is no faster way to get your network access turned off than to
leave the setting turned on when connecting on campus.
Windows 7
1. Click Start.  > Click Control Panel.
2. Double-click Network and Internet
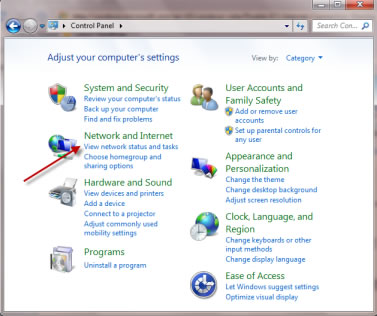
3. Click Network and Sharing Center

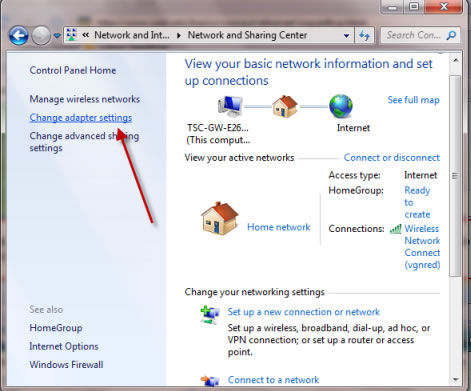
4. In the left-hand column of the Network and Sharing window, select Change adapter settings
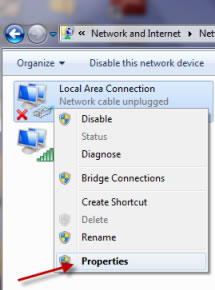
5. The following change only needs to be made if there is more than one network connection listed.
For each network connection listed, right-click the connection and click Properties
.
6. If you see the User Account Control dialog box at any point during the configuration process, click Continue.
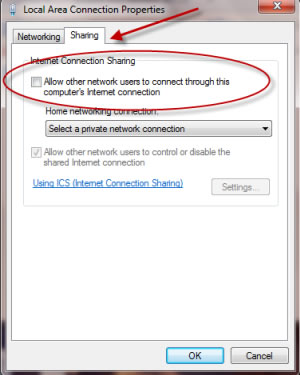
7. Click the Sharing tab. Under the Internet Connection Sharing, make sure that the checkbox in front of Allow other network users to connect through this computer's Internet connection is NOT checked, as shown in the following graphic:
8. Click OK to save the setting
9. Close the Control Panel window.
No comments:
Post a Comment